| |
|
| 1.
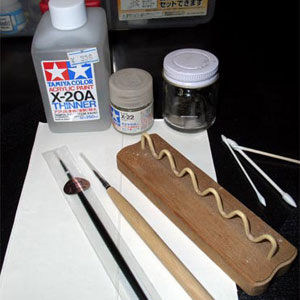
Wiping the head with the weak thinner. This step is required because it helps
paints stays on soft vinyl heads easier. Dilute the brown acrylic paint with Tamiya
X-20A and draw the base line. If you need to redo it, wipe it off with paint thinner
or fingernail polish remover. You can use color pencils (non-oil kind) for the
base drawing also. Putting a small towel under
the hand as a cushion when drawing might be helpful for you.
|
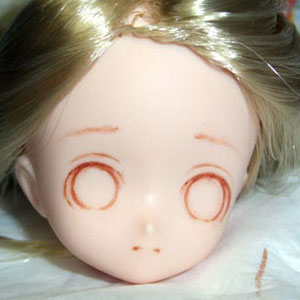
2. Using a toothpick, check the balance
of the eyes height occasionally. (Even put the head upside down to see the balance!)
Don't make the brown lines too dark. |
|
|
|
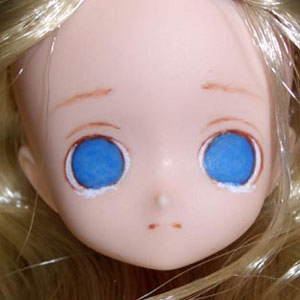
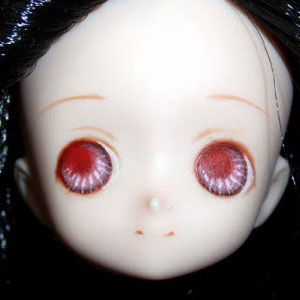
| 3.
Choose the color of the eyes, and draw it on the eyes. The acrylic paints dry
soon, so layer with thin layers to make it a darker color. |
4. Add some accent using white and
darker colors to the base color. Start adding the similar color to the base color
and use gradually darker or weaker colors. (Don't start with the white!) Using
different darknesses of the color, make the eyes sophisticated. |
| |
|
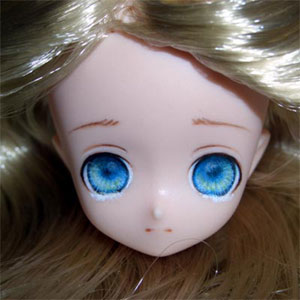
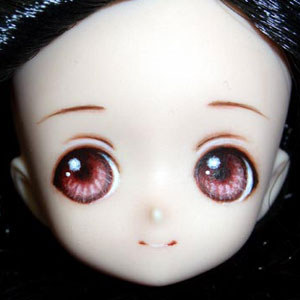
5.
Let's finish it up by adding the iris using a thin pen brush.
Before doing
it, you may want to practice drawing thin lines on a Kleenex.
To make it complete,
add highlight with the white color on the eye. The position of highlight is up
to you. The picture above has tears added, too. Add
some colors on the eyebrows and lips. Draw them up without any hesitation to make
clear lines. Add makeup on her cheek with a make-up brush. |
Another drawing-eyes example |
| |
| Adding cat ears
makes it look cuter! |
| |
|
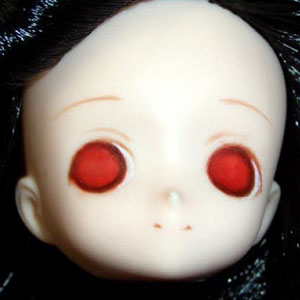
| 6. Draw eyes following steps 1 to 3 above
except using red for the base color instead. | 6.
Add white iris. |
| |
When using hair transplanted
heads, brush hair back and tie it well before starting. Leave it until the paint
is dry for sure. Then, trim the hair to match the face up! |
| 7. Add shadows and highlights to finish. | |